Old-Fashioned Rice Pudding
These Key Lime Pie Bars are sweet and tart and totally irresistible! Made with the perfect graham cracker crust, a creamy, zesty filling, and a dusting of powdered sugar & lime zest, they’re the perfect cool and refreshing dessert for summer.
Ingredients
Graham Cracker Crust
1½ cups graham cracker crumbs
6 tablespoons salted butter melted
⅓ cup granulated sugar
Key Lime Filling
14 ounces sweetened condensed milk 1 can
5 egg yolks
½ cup key lime juice
2 tablespoons key lime zest
Topping
powdered sugar optional
2 tablespoons key lime and/or lemon zest optional
Instructions
Graham Cracker Crust
Preheat oven to 375°F.
Spray an 8-inch or 9-inch square pan with cooking spray and line with parchment paper.
Combine graham cracker crumbs, butter, and sugar in a small bowl and stir until combined.
1½ cups graham cracker crumbs,6 tablespoons salted butter,⅓ cup granulated sugar
Press the graham cracker crumb mixture into the bottom of the prepared pan and press down firmly. Use the bottom of a measuring cup to really pack it in.
Bake the graham cracker crust for 7 minutes. Remove from the oven and let cool.
Key Lime Filling
Preheat the oven to 350°F.
Whisk the sweetened condensed milk, egg yolks, lime juice and zest together in a medium bowl.
14 ounces sweetened condensed milk,5 egg yolks,½ cup key lime juice,2 tablespoons key lime zest
Pour over cooled crust and bake for 25 minutes. Let the bars chill before serving.
Dust with powdered sugar and sprinkle with additional zest if desired. Cut into bars, serve and enjoy!
powdered sugar,2 tablespoons key lime and/or lemon zest
Storage Information Notes
Refrigeration: Wrap the bars tightly with plastic wrap, or store them in an airtight container, in the refrigerator for up to seven days.
Freezing: The bars can be frozen for up to two months in an airtight, freezer-safe ziplock bag. Thaw overnight in the refrigerator before serving.
Nutrition
Calories: 187kcal | Carbohydrates: 25g | Protein: 3g | Fat: 9g | Saturated Fat: 5g | Cholesterol: 81mg | Sodium: 124mg | Potassium: 121mg | Fiber: 1g | Sugar: 20g | Vitamin A: 285IU | Vitamin C: 2.9mg | Calcium: 86mg | Iron: 0.5mg
Author: Trish - Mom On Timeout
-From: https://www.momontimeout.com/irresistible-key-lime-pie-bars/
The Best Key Lime Pie recipe EVER! Tart and sweet and incredibly easy, this Key Lime Pie is sure to be a family favorite! A delicious graham cracker crust filled to the brim with an incredibly creamy filling that is just so quick to make! You won’t be able to stop at just one slice! If you are in a hurry, and I mean, a BIG HURRY, I would perhaps allow you to use a store bought pie crust and a can of whipped cream. This pie would still be heavenly. No doubt. (Edited to add: I made the crust in the video but as we were running out of time, I used a can of whipped cream in the video below. Works in a pinch!)
Ingredients
Graham cracker crust
1 1/2 cups graham cracker crumbs
1/3 cup granulated sugar
6 tbsp butter melted
Key Lime Filling
28 oz sweetened condensed milk
1/2 cup light sour cream
3/4 cup key lime juice
zest from 2 regular limes or 4 key limes
Whipped Cream Topping
1 cup heavy whipping cream
1/2 cup powdered sugar
1 tsp vanilla extract
Instructions
Graham cracker crust
Preheat oven to 375F.
Mix graham cracker crumbs, sugar, and butter in a small bowl. Press the crumb mixture into an 8" - 9.5" pie pan. Bake for 7 minutes. Cool for at least 30 minutes.
Key Lime Filling
Preheat oven to 350F
Whisk together sweetened condensed milk, sour cream, lime juice, and lime zest in a medium bowl. Pour into prepared graham cracker crust and bake for 10 minutes.
Let pie cool slightly before chilling. Chill for at least 3 hours.
Whipped Cream Topping
Beat heavy cream and sugar together in a mixer until stiff peaks form. Beat in vanilla. Spread or pipe the whipped cream on top of the cooled pie. Top with additional lime zest if desired.
Nutrition
Calories: 517kcal | Carbohydrates: 66g | Protein: 8g | Fat: 25g | Saturated Fat: 15g | Cholesterol: 81mg | Sodium: 262mg | Potassium: 359mg | Sugar: 58g | Vitamin A: 810IU | Vitamin C: 2.3mg | Calcium: 269mg | Iron: 0.7mg
Prep Time10 minutes | Cook Time17 minutes | Total Time27 minutes | Servings10 servings
AuthorTrish - Mom On Timeout
-From: https://www.momontimeout.com/best-key-lime-pie-recipe/
Creamy vanilla yogurt, ripe berries, and crunchy granola clusters are layered in an easy, grab-and-go jar.
Serves: 4, Makes: 4, Prep Time: 8 minutes to 10 minutes
Ingredients
2 cups vanilla regular or Greek whole-milk or reduced-fat yogurt, divided
2 cups store-bought or homemade granola, divided
2 cups fresh fruit, such as blueberries, raspberries, blackberries, or sliced strawberries, divided
Honey or maple syrup (optional)
A bowl of creamy yogurt topped with crunchy granola and fresh fruit is a morning staple, but lately I’ve been ditching the bowl and building my breakfast for on-the-go eating. In this easy recipe, creamy vanilla yogurt, ripe berries, and crunchy granola clusters are layered parfait-style in glass jars or cups, ensuring every bite is brimming with flavor, color, and texture. Here’s how to make a simple fruit and yogurt parfait.
Why You’ll Love It:
It’s the easiest breakfast, dessert, or snack. A yogurt parfait is an incredibly easy breakfast (or dessert!) made by alternating layers of yogurt, granola, and fruit in a jar or cup.
You can customize it any way you like. Use your choice of yogurt, store-bought or homemade granola, and any combination of fresh fruit for your parfaits.
Key Ingredients in Yogurt Parfaits
Yogurt: I recommend starting with creamy vanilla yogurt when building these striated snacks, but the style (Greek or regular) and fat percentage are up to you.
Granola: Both store-bought and homemade granola work well in a yogurt parfait. Choose one that has a good mix of bigger clusters and smaller crumbles so that there are sweet and crunchy oats in every bite.
Fruit: You can use any combination of fresh fruit, such as blueberries, raspberries, blackberries, or sliced strawberries.
Honey or maple syrup (optional): A drizzle of honey or maple syrup can be added as a finishing touch.
How to Make Yogurt Parfaits
Build the parfaits in jars or glasses. Spoon yogurt into the bottom of each one. Top each with some granola and fruit. Repeat layering the remaining yogurt, granola, and fruit. Drizzle with honey or maple syrup, if desired.
What’s the Best Yogurt for Parfaits?
Greek vs. regular: Greek yogurt is thicker than regular yogurt, which helps create clean lines between parfait layers. Since it has less moisture, Greek yogurt also won’t soften granola as quickly as regular yogurt if you’re making the jars in advance.
Full-fat vs. reduced fat: Whole-milk yogurts are usually more filling, so use that variety if you’re looking for a breakfast that will keep you full until lunchtime.
Helpful Tips
Meal prep. Planning to meal prep the parfaits? Use granola with big clusters, as it will take longer for the moisture from the fruit and yogurt to seep in and soften it.
Add-ins. Dried fruit and nuts adds an extra layer of texture and flavor without adding more to your prep time.
Build the parfaits in 4 (12- to 16-ounce) jars or glasses: Spoon 1/4 cup vanilla yogurt into the bottom of each one. Top each with 1/4 cup of the granola and 1/4 cup of the fruit. Repeat layering the remaining yogurt, granola, and fruit. Drizzle the top of each with honey or maple syrup, if desired.
Recipe Notes
Make ahead: The parfaits can be assembled, covered, and refrigerated up to 3 days in advance. The granola will soften to a chewy consistency.
-From: https://www.thekitchn.com/yogurt-parfait-recipe-23270538#post-recipe-318820008
Jolly Rancher Candy Apples Recipe + Video
How to Make Candy Apples Recipe
Ingredients and Materials:
• 3 cups sugar
• 1/2 cup corn syrup
• 1 cup water
• White and pink gel/food colouring
• Rock candy ( • How to Make Rock Candy (No Bake Recipe) fr... )
• Pink, white food/gel colouring (http://amzn.to/2dbCRuB)
• Pink sprinkles
• Apples
• Wooden apple sticks
Candy Apples Procedure:
1. Wash, dry and remove stems from apples. Insert a wooden apple stick into the top of the apple.
2. Place sugar, corn syrup and water into a saucepan and heat on medium high until mixture reaches between 250F-300F.
3. Remove sugar from heat and stir in white colouring, then pink colouring.
4. Turn the pot slightly to the side, and twirl apple in the hot liquid.
5. Once apple is fully coated in sugar, place it onto a piece of parchment paper, or on a silicone mat. Allow to harden. Repeat for additional apples.
How to Make Glitter Jolly Rancher Apples Candy Apples
Ingredients and Materials:
• 50 Jolly Ranchers (single colour)
• Edible glitter ( • How to Make Edible Glitter 3 Different Way... )
• Pink sprinkles
• Apples
• Wooden apple sticks
Candy Apples Procedure:
1. Wash, dry and remove stems from apples. Insert a wooden apple stick into the top of the apple.
2. Preheat oven to 350F. Unwrap Jolly Ranchers and place into a cake pan, or oven safe bowl. Place into oven for 15 minutes, or until candy has liquefied.
3. Remove pan from oven, and pour glitter into the candy. Stir with a spatula and return pan to the oven for 5 more minutes.
4. Remove the pan from the oven again, turn the pan slightly to the side, and twirl apple in the hot liquid.
5. Once apple is fully coated in sugar, place it onto a piece of parchment paper, or on a silicone mat. Allow to harden. Repeat for additional apples.
See Video Below:
Video Link: https://www.youtube.com/watch?v=M3d2G8uTMRA
A fun and festive treat with colorful stripes.
Equipment
Saucepan For cooking the candy coating
Candy thermometer To monitor the candy's temperature
Baking Sheet To cool the apples
Ingredients
Apples & Sticks
6 medium apples washed, dried, stems removed
6 lollipop sticks or paper straws
Candy Coating
2 cups sugar
0.5 cup light corn syrup
0.5 cup water
0.5 teaspoon clear vanilla extract
1 Gel food coloring red, orange, yellow, green, blue, purple.
Instructions
Insert lollipop sticks into the bottom of each apple.
In a saucepan, combine sugar, corn syrup, and water. Stir over medium heat until sugar dissolves.
Bring the mixture to a boil, without stirring, until it reaches 300°F (150°C) on a candy thermometer.
Remove from heat and stir in vanilla extract.
Divide the candy into separate bowls. Add a different color of gel food coloring to each bowl, stirring until evenly distributed.
Dip each apple into the different colored candy coatings, creating stripes. Let excess drip off.
Place the apples on a baking sheet lined with parchment paper to cool completely.
Notes
For best results, use firm apples like Granny Smith or Fuji. Allow apples to cool completely before serving to prevent sticking.
Prep Time 20minutes mins
Cook Time 20minutes mins
Servings 6 apples
Calories 250 kcal
-From: https://tastywithlara.com/deliciously-festive-striped-candy-apples/
Cotton Candy Swirl Glow-in-the-Dark Candy Apples – A Magical Treat!
Author: Freya Allen Total Time: 25 minutes Yield: 6 candy apples 1x Diet: Vegetarian
These Cotton Candy Swirl Glow-in-the-Dark Candy Apples are a fun, mesmerizing treat perfect for Halloween, parties, and themed events!
Ingredients
6 medium apples
2 cups granulated sugar
1/2 cup light corn syrup
1/2 cup water
1/2 tsp vanilla extract
1/4 tsp neon food coloring (pink, blue, or purple)
1/4 tsp tonic water (for glow effect)
6 wooden sticks
Instructions
Wash and dry apples, insert wooden sticks.
In a saucepan, heat sugar, corn syrup, and water until boiling.
Add vanilla, food coloring, and tonic water, then heat to 300°F.
Dip apples in the candy coating and swirl for a cotton candy effect.
Let apples cool on parchment paper before serving.
Notes
Use tonic water to create the glow-in-the-dark effect under black light.
Work quickly when dipping apples to prevent hardening.
Store in an airtight container at room temperature for up to 2 days.
Tips for perfect glow in the dark candy apples:
Use a candy thermometer: Once the candy reaches the right tempurature, you must dip the apples fast before the mixture ardens.
Work quickly: Once the candy reaches the right temperature, you must dip the apples fast before the mixture hardens.
Experiment with colors: Use neon food dyes for a brighter and more vibrant swirl effect.
Store properly: Keep the apples in a cool, dry place to prevent the candy from becoming sticky.
Variations & Customization Ideas:
1. Different Flavors
Add cotton candy extract or bubblegum flavoring for an even sweeter taste.
infuse with citrus zest for a tangy kick.
2. Extra Decorations
Sprinkle edible glitter or sanding sugar before candy sets.
Drizzle with white, dark, or other colored chocolate for added contrast.
Nutrition
Serving Size: 1 appleCalories: 230Sugar: 50gSodium: 10mgFat: 0gSaturated Fat: 0gUnsaturated Fat: 0gTrans Fat: 0gCarbohydrates: 58gFiber: 4gProtein: 0gCholesterol: 0mg
Find it online: https://www.skinytaste.net/cotton-candy-swirl-glow-in-the-dark-candy-apples-a-magical-treat/
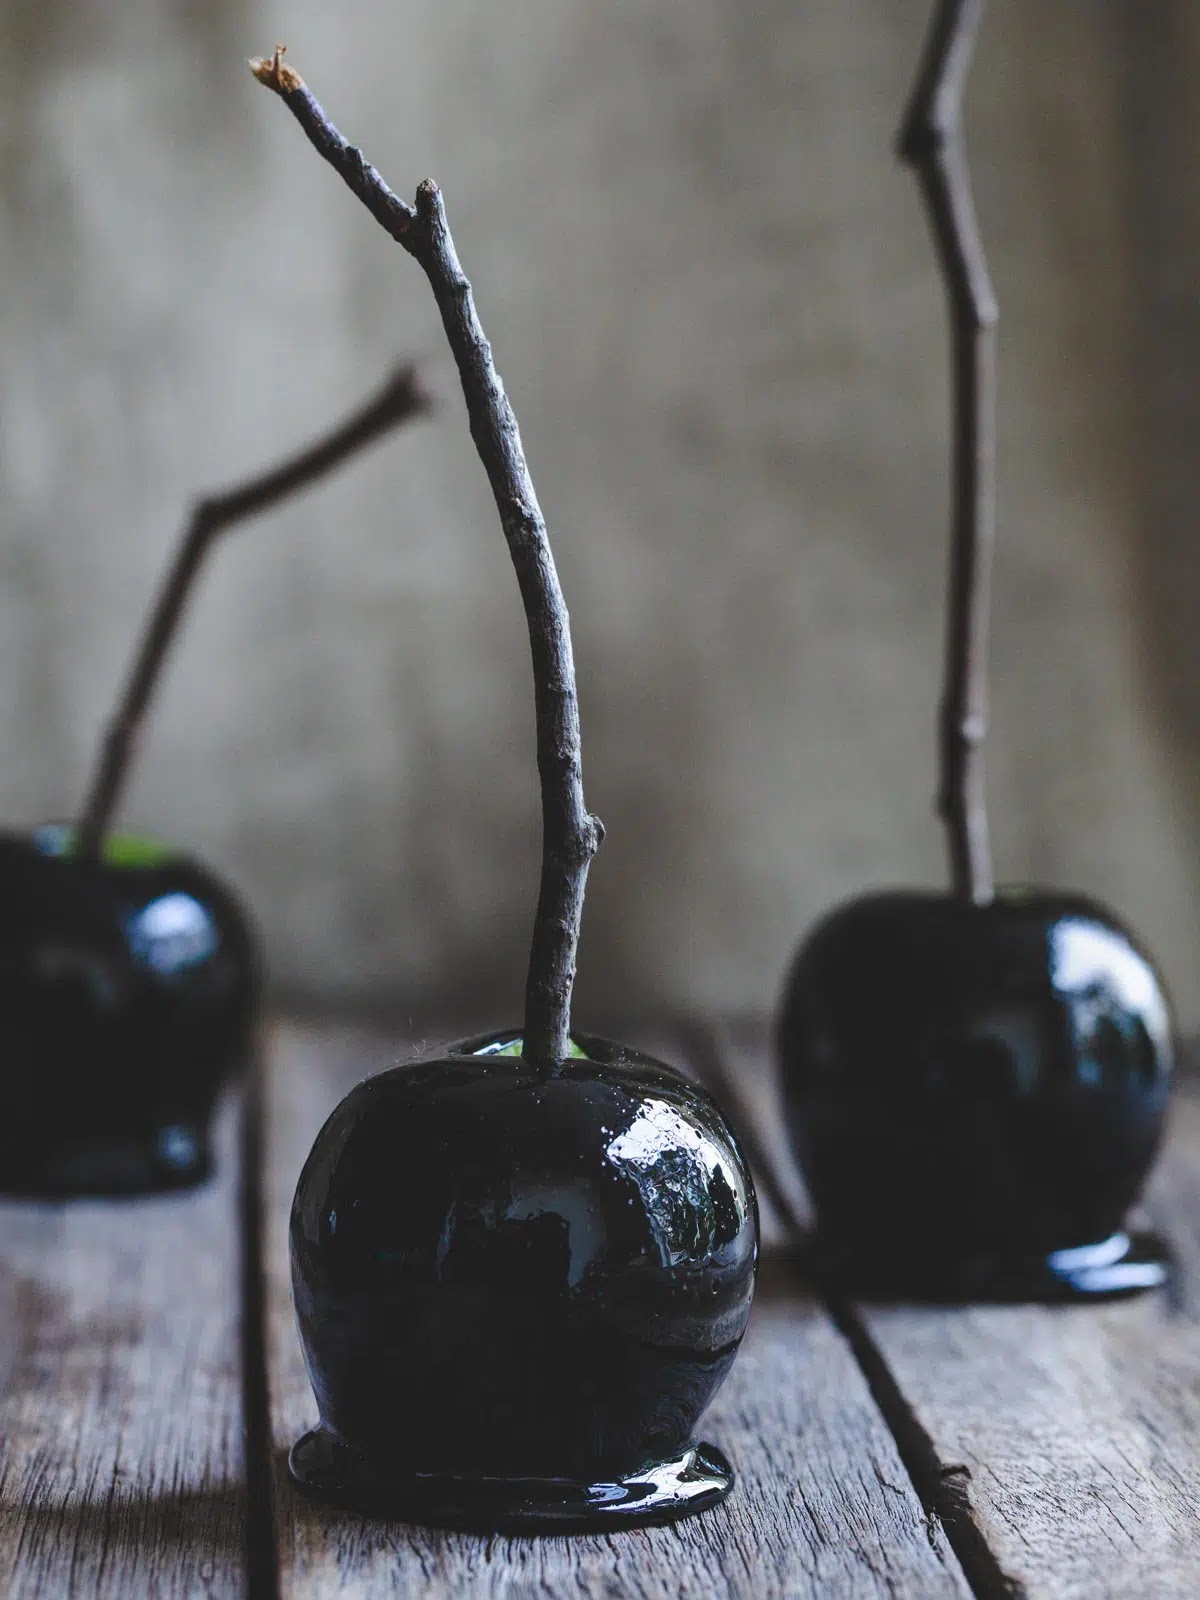
Black Poison Swirl Candy Apples Halloween Recipe
Prepare to cast your own spell in the kitchen with these Black Poison Swirl Candy Apples! With their glistening, mysterious coating and deep black-purple swirls, they’re as hauntingly beautiful as they are delicious. A crisp apple center cloaked in crackly, spiced candy shell makes every bite a delight. Whether you’re looking to impress at a Halloween bash or simply treat yourself to something thrilling, Black Poison Swirl Candy Apples are the dramatic centerpiece you never knew you needed.
Ingredients You’ll Need
The beauty of Black Poison Swirl Candy Apples lies in the simplicity of the ingredients, each one bringing something magical to the mix. The apples provide a fresh, tart contrast to the sweet, spiced shell, while the food colorings create that spellbinding swirl. Here’s what you’ll need to conjure them up:
How to Make Black Poison Swirl Candy Apples
Step 1: Prepare the Apples
Start by giving your apples a good wash and dry. To help the candy adhere (and to remove any pesky wax), plunge each apple into boiling water for a few seconds, then dry them completely. This quick spa treatment ensures your candy coating will cling tight instead of slipping off.
Step 2: Insert the Sticks
Grab your candy apple sticks and insert one firmly into the center of each apple, pushing about halfway through. This step is both practical and fun—like mounting jeweled orbs onto their scepters, getting them ready for their grand appearance!
Step 3: Make the Candy Coating
Combine the sugar, corn syrup, and water in a heavy-bottomed saucepan. Set the heat to medium and stir gently, watching as the sugar dissolves and your potion becomes clear. This is an important step, as undissolved sugar can lead to a grainy coating; smoothness is key for a flawless finish!
Step 4: Boil to Hard-Crack Stage
Once your sugar is melted, crank up the heat to medium-high. Stop stirring and let the mixture boil. Clip your candy thermometer to the pan—it’s your trusty guide to that all-important 300°F (the hard-crack stage). Resist the urge to stir; just watch as the bubbles work their magic.
Step 5: Stir in Color and Flavor
When the candy mixture hits 300°F, remove it from the heat quickly. Working fast, add in the black and purple gel food colorings, vanilla, and (if you want a cozy, spicy note) the cinnamon extract. Stir until completely combined—watch those colors swirl together into an enchanting midnight hue!
Step 6: Dip and Swirl the Apples
Carefully dip each apple into the molten candy, swirling it as you lift and twirl to get even color and coverage. Let the excess drip off, then place each apple onto a parchment-lined baking sheet. The swirling motion not only coats but also creates those hypnotic streaks of purple among the black.
Step 7: Let Set and Enjoy
Once all your Black Poison Swirl Candy Apples are coated, let them cool at room temperature. As they set, the candy hardens into a glassy, mirror-like shell—perfect for both ogling and devouring. Now, they’re ready for the spotlight!
How to Serve Black Poison Swirl Candy Apples
Garnishes
For an extra touch of wicked glamour, try drizzling set apples with melted black or white chocolate to give a marbled effect, or dust with edible glitter for an enchanted vibe. You can also sprinkle a pinch of flaky sea salt over the surface while the candy coating is still warm for that addictive salty contrast.
Side Dishes
Pair your Black Poison Swirl Candy Apples with a platter of caramel popcorn or rich dark chocolate brownies to balance out the tartness. For a lighter option, a fresh fruit platter with grapes and berries works beautifully, keeping the Halloween mystique alive while lightening up the spread.
Creative Ways to Present
Showcase your Black Poison Swirl Candy Apples on a cake stand filled with dry ice for an utterly dramatic, fog-shrouded reveal. Or, bundle apples in cellophane with a black satin ribbon for party favors that look straight out of a storybook. They’re also a fantastic centerpiece piled high on a midnight-hued platter, surrounded by twinkle lights or scattered purple rose petals.
Make Ahead and Storage
Storing Leftovers
If you have any leftovers (a rarity!), store your Black Poison Swirl Candy Apples at room temperature in a cool, dry place. Keep them separated so they don’t stick together, and avoid humid spots to keep the candy shell crisp. They should last about 2-3 days without losing that wonderful crunch.
Freezing
Freezing Black Poison Swirl Candy Apples is not recommended. The candy coating can crack or sweat when thawed, leading to a sticky mess and loss of that perfect, glassy finish.
Reheating
These apples are meant to be enjoyed at room temperature, as reheating will soften or melt the candy shell and diminish the magic. If the coating becomes a little tacky on humid days, let them sit uncovered in a cool, dry spot until the surface regains its snap.
FAQs
Can I use a different type of apple for Black Poison Swirl Candy Apples?
Absolutely! While Granny Smith and Honeycrisp are traditional choices because of their tartness and firmness, you can experiment with Fuji, Gala, or Pink Lady apples as well. Just pick apples that are fresh and very firm for the best results.
Is gel food coloring essential for the swirl effect?
Yes, gel food coloring is strongly recommended for Black Poison Swirl Candy Apples. It provides deep, vivid color without watering down your candy mixture, which is crucial for that bold, mesmerizing finish.
Can I add other flavors to the candy coating?
Definitely! The recipe suggests vanilla and cinnamon, but you can play around with extracts like almond, anise, or even orange for a unique twist. Just add extracts at the same stage as the recipe indicates for a custom flavor profile.
How do I prevent bubbles or drips in the candy coating?
Make sure your apples are completely clean and dry before coating. Bubbles often form when moisture is trapped under the candy layer. Also, allow excess candy to drip off for a smooth, even finish—twirling the apple slowly as you lift it from the pot helps achieve that flawless look.
What’s the best way to create a marbled effect in the swirl?
After dipping your apple in the black candy mixture, quickly drizzle a bit of extra purple (or even white) melted candy or chocolate over the top, then gently swirl with a toothpick or the stick. The result is those Instagram-worthy marbled Black Poison Swirl Candy Apples that steal the show.
Final Thoughts
If you’re ready to impress, treat your guests, or just have some kitchen fun, Black Poison Swirl Candy Apples are your golden (or should I say, dark and mysterious) ticket. Gather your ingredients, unleash your creativity, and dive in—these candy apples are sure to be the talk of any table. Enjoy spinning up a little magic!
-From: https://cookedbysarah.com/black-poison-swirl-candy-apples-recipe/